How do I bulk upload feedback files to students assigments?
This guide will show you how to download and upload bulk assignment feedback into Brightspace. This is helpful to those faculty that elect to download their students’ assignments and wish annotate outside of Brightspace (i.e., Word). This will also allow you to add any additional files as feedback attachments for feedback purposes.
PLEASE NOTE: It is recommended that you create a separate file folder to save your files. This will ensure that you can easily access these files and find them when it is time to upload them to Brightspace.
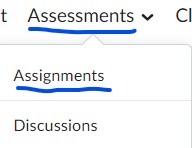
Step 1: Download Student filed
Locate the assignment that you wish to download the assignments from. For this example, we are using “Bulk Upload Assignment Test”
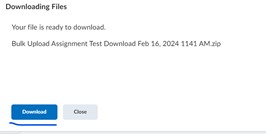
From here check the box next to “Last Name” and then Download (PLEASE NOTE: it is recommended that you preform this once the assignment deadline has passed. This will ensure that you do not download duplicate files or miss any students’ assignments)
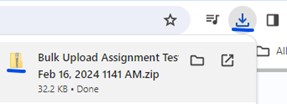
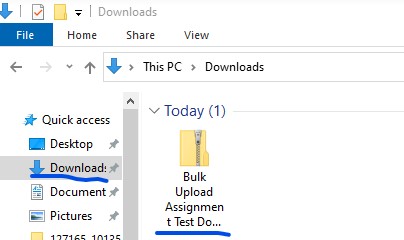
Step 2: Locate your downloaded zip file and extract files
Go to your file folders and select “Download.” You will notice that your zip file is the same name as the assignment that you downloaded.
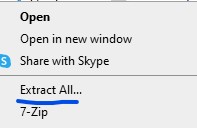
Right click on the zip file and select “Extract All”
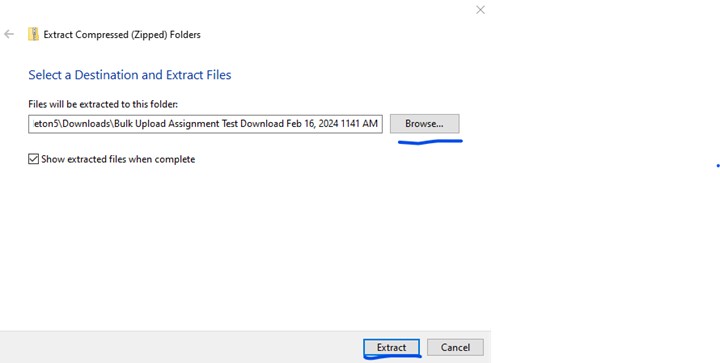
You should see another pop-up screen. Here is where you can select where you want to extract the student folder submissions. Click on Browse and select your folder and then “Extract”
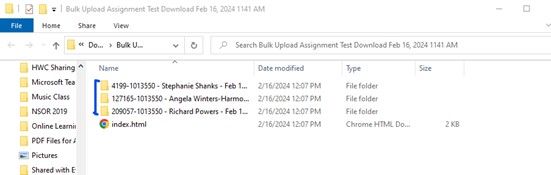
This will allow your extracted file folder window to open. You will notice that the student file folders have a series of numbers in front of the name. DO NOT CHANGE THIS. These numbers are identification numbers for Brightspace. These numbers tell Brightspace what student file to upload attachments to. You are now ready to go into each student file and review their submissions.
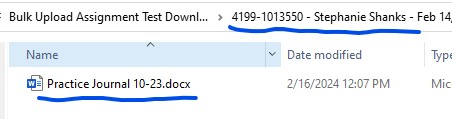
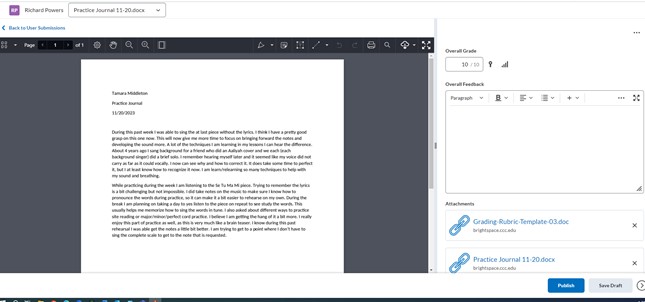
When you click on the student file folder you will see the student file submission that you are able to open in word or the file type the student submitted their assignment in.
Step 3: Begin annotating your students files
As you edit your file you will be able to save that file back to the same student file folder.
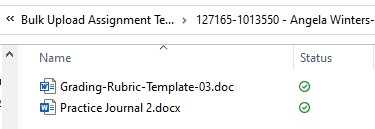
PLEASE NOTE: You are also able to add additional files to upload to the student’s feedback. In this next step we have added a “Rubric” file to go along with the annotated student essay.
Once you have annotated all your student files you can move to the next step.
Step 4: Zip all student files folders into a new zip file
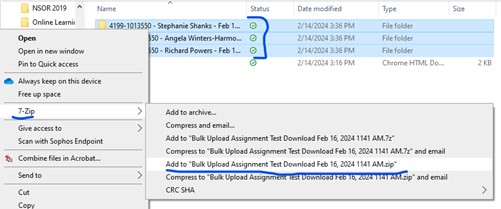
When you are ready to zip all your student files go back to the file folder that shows you all your student file folders. Click Once on the first file folder, press and hold the “Shift key” and click once on the last file folder. As show below this will highlight all student file folders. Then right click and select “7-zip” and then “Add to (file folder name here).zip”
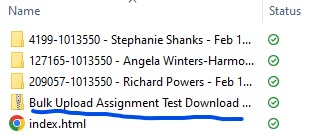
You will then see a zip file added to your file folder. Now we are ready to upload to Brightspace.
Step 5: Upload zip file back to Brightspace
Log back in to Brightspace and go to the assignment you want to upload your files to. Just as you did in the begin, make sure you check the box next to “Last Name.”
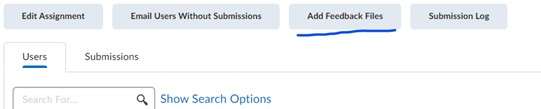
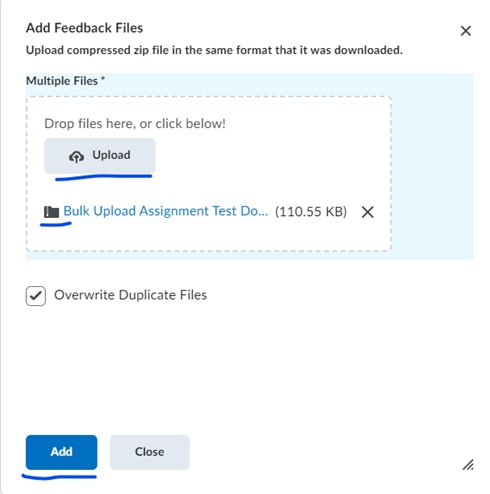
Once selected, in the top bar below the assignment name, click on “Add Feedback Files”
You will see a pop-up screen. Click on upload to locate your zip file and then click on “Add”
If done correctly this pop up will close and bring you back to the Assignment submission page.
Step 6: Input grades individually and publish grades.
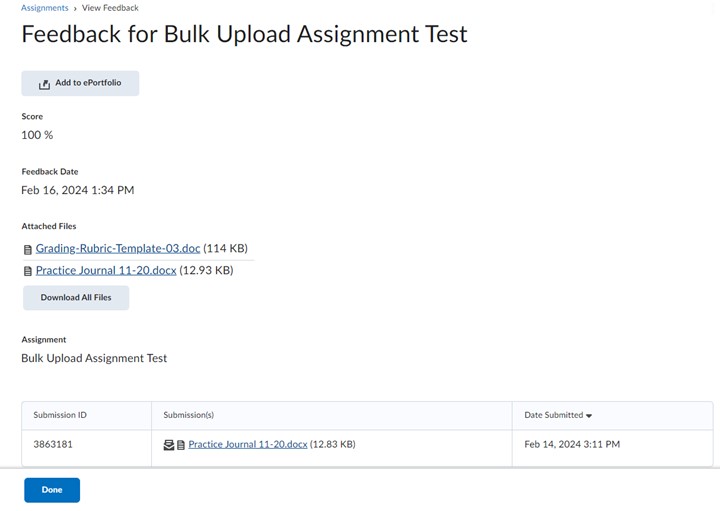
You are now ready to input your student grades with the attached feedback files and publish your grades. Once published students will be able to see the attached files you uploaded to their assignment.
Instructor View
Student View
Last updated byTamara Middleton on February 26, 2024