Please use this quick guide to assist you in creating lockers for your course. You can create lockers for groups or for individual students.
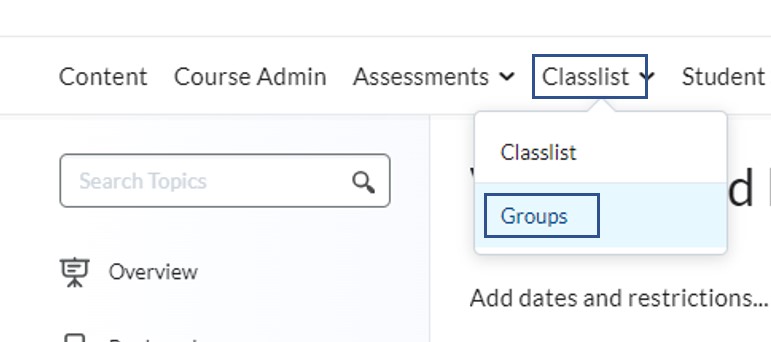
Step 1:
In your Brightspace course, click on Classlist and Groups
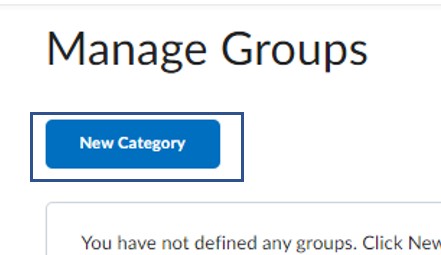
Step 2:
Click on New Category
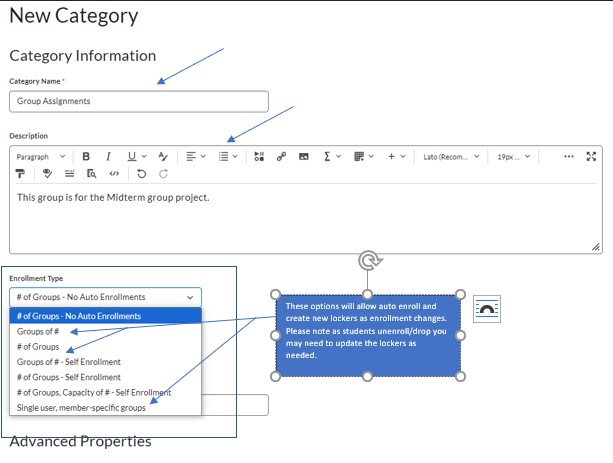
Step 3:
Here is where you will create your locker group.
Here are some things to keep in mind:
1. You can create your category and add a description.
2. The items outline to the right will allow you to auto enroll students in to groups and create new groups as needed based on enrollment. As students enroll they will automatically create and distribute memebers based on the options you select. If students unenroll/drop you may need to go in and make manual updates.
4. You can also create individual locekrs where only you and that student can see what is added in the locker. Only members of the group are able to see the group and locker content.
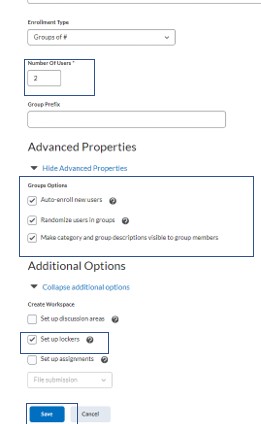
Step 4:
For this guide we have selected Number users per group. This will max out the number of members that will be added to each group.
If you selected Number of groups this will distribute the users among the maximum number of groups that have been determined by your.
If you want auto enrollment make sure to select the check boxes un der Advance Properties, and select “Set up Lockers”
Then click on Save
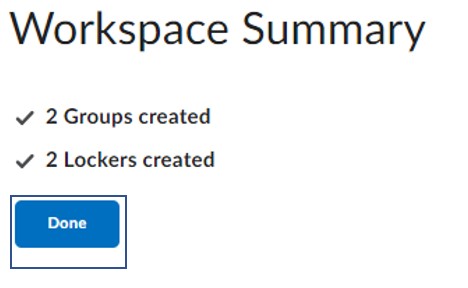
Step 5:
You will get a confirmation page. Click on “OK”
Step 6:
Once your groups have been created you will get a report screen of how many groups have been created. Click on “OK.”
This will take you back to the groups landing page.
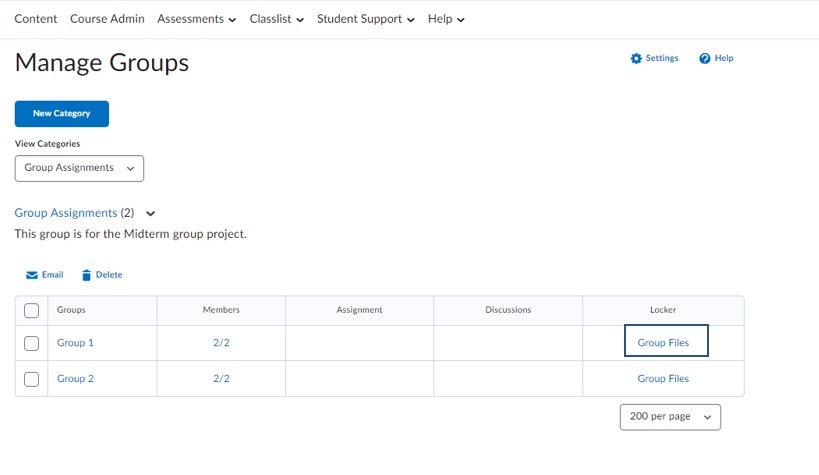
Step 7:
You can now see all of the groups that are created. To see the files that have been added to the lockers or to update or create files/folders for different groups click on “Group Files” under the locker column.
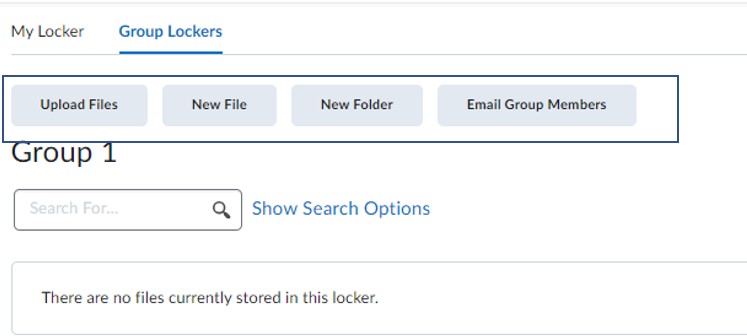
Step 8:
Here you will see any files that have been upload.
At the top of the screen you will see options to create files, folders, upload files or email members of this particular group.
Last updated byTamara Middleton on October 18, 2024