How to enable chat responses and video in your waiting room

PLEASE NOTE: The waiting room video should not exceed 30 seconds. The video is best used as a welcome tool to let your participants know that you are aware of their presence and that you will be with them shortly. Longer videos may not upload properly and may cause some compatibility issues.

Here are the steps to enable these features in your Zoom waiting room:

1. Log into your zoom account at zoom.us
2. On the left side of the screen click on “Settings”
3. In the settings window, scroll down to “Waiting Room”
4. To enable participate response in the waiting room:

a. Click on “Edit Options”

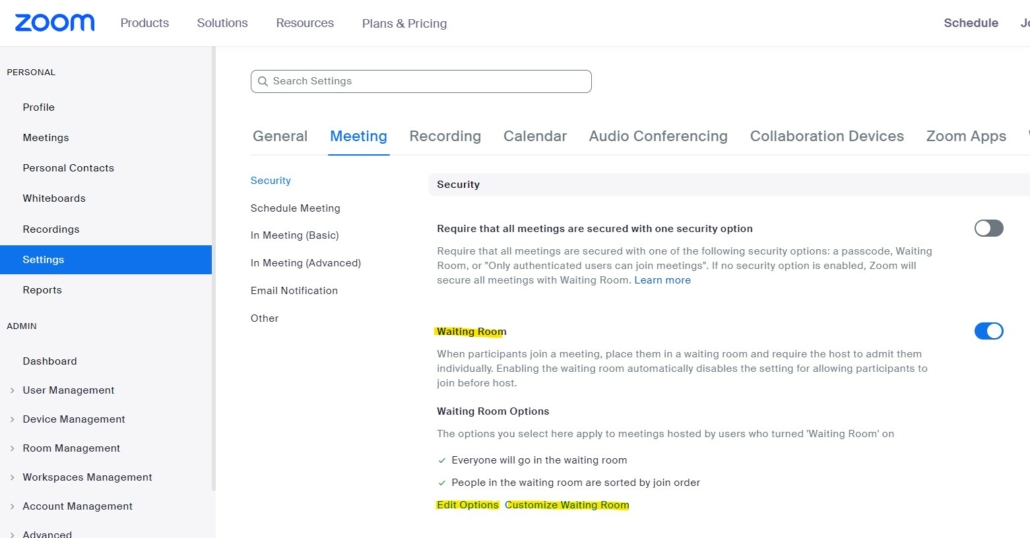
zoom meeting settings with waiting room highlighted as well as Edit Options and Customize Waiting Room text highlighted.


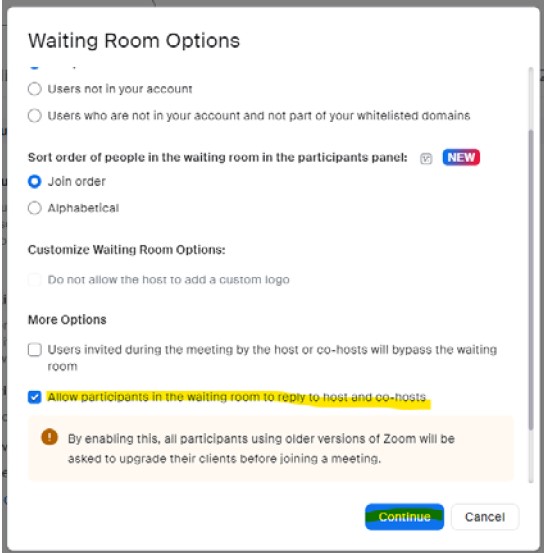
b. In the pop-up screen, scroll down to more options and check the “Allow participants in waiting room…”


c. Click on “Continue”


5. To add a video to your waiting room: 

a. In the settings screen under Waiting room, click on “Customize Waiting Room” 

zoom meeting settings with waiting room highlighted as well as Edit Options and Customize Waiting Room text highlighted.


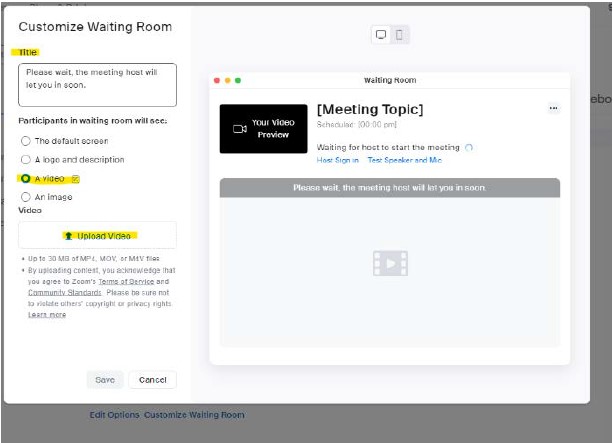
b. In the pop-up screen, select “A Video” option and upload your video

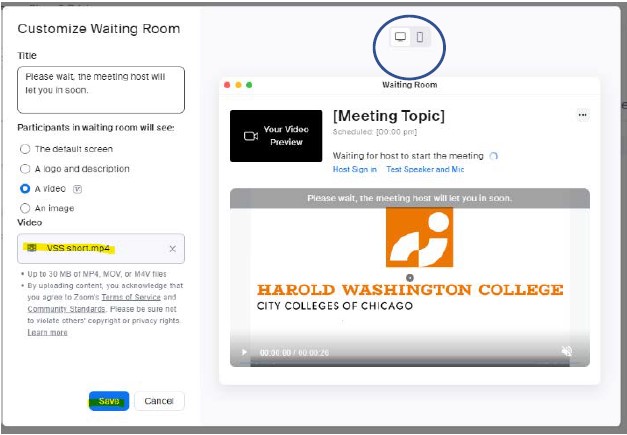
c. Once uploaded, you can test the view and see how it will look on both computer and mobile device

Customize waiting room settings with title, a video, and upload video text highlighted.


d. If you are satisfied with the video, click “Save

Zoom is CCC’s standard online meeting platform for instruction. However, if Zoom is unavailable or if you wish to use an alternative for any reason, you can use Microsoft Teams instead. Microsoft Teams has many of the same features as Zoom. It’s easy to create a Teams meeting link.

From the desktop version of Outlook:

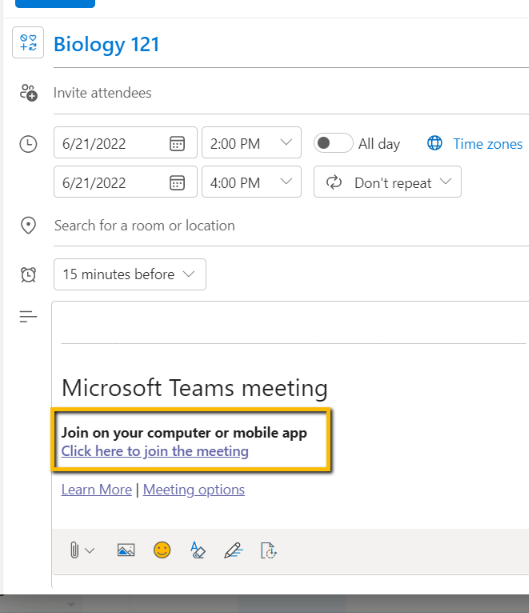
  1. Create a new meeting. Click the Teams Meeting icon on the Event toolbar. This will create a Team link in the body of your meeting
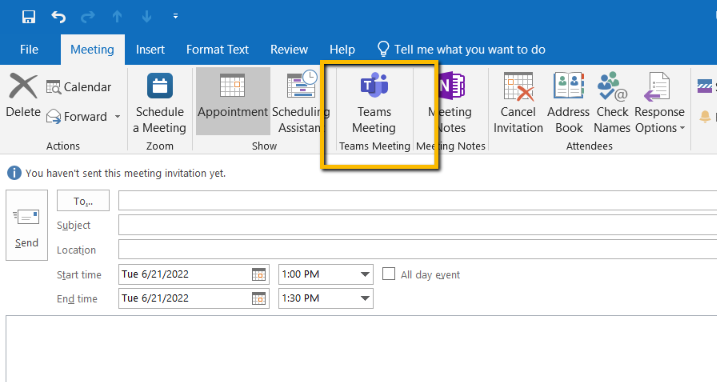
2.Copy the Teams link into your Brightspace course, or email it to your students. When it comes time to start the meeting you can either join the meeting from Outlook, or click on the same link you emailed to the students.
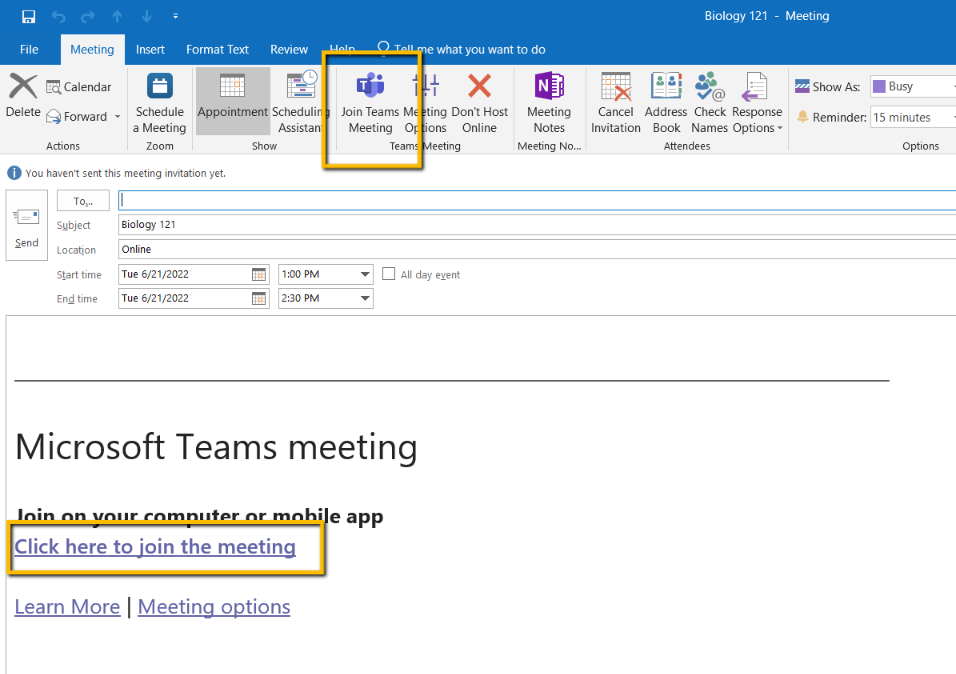
Click on Join Teams Meeting to create a Teams meeting link. Then copy the link and paste it into your brightspace course


From the Web version of Outlook


1. From http://mail.ccc.edu, click the Calendar icon, and then click New Event
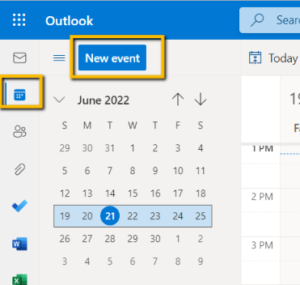
 

2. Add the start and end times of your meeting, and be sure to toggle the Teams meeting to on. Note, if you add at least one attendee, the toggle will automatically switch to on.
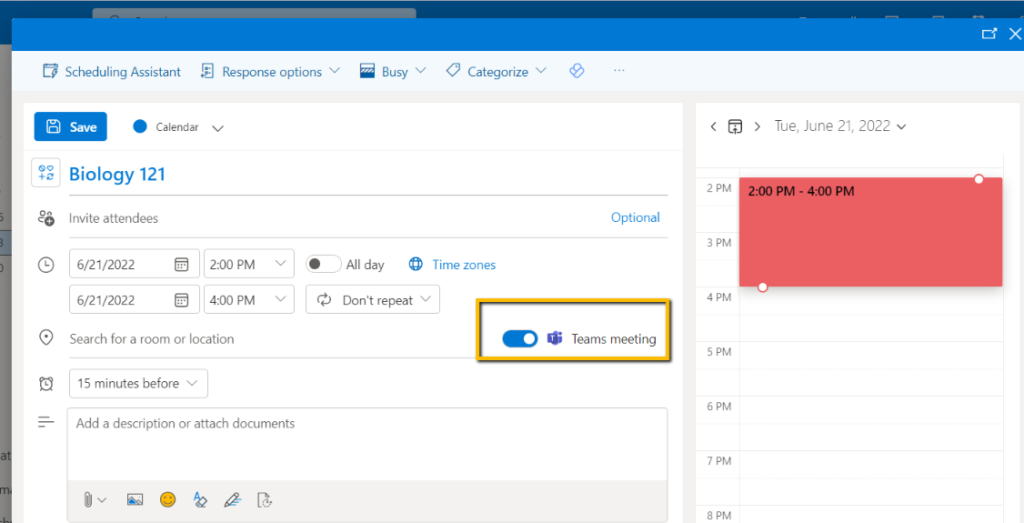
 

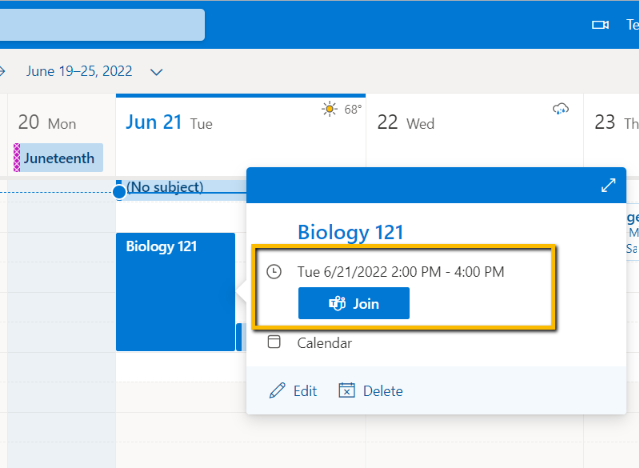
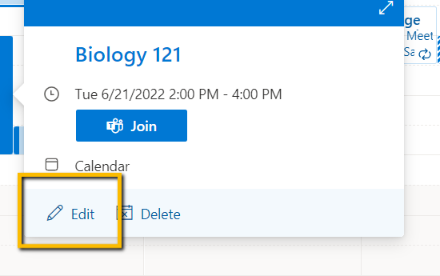
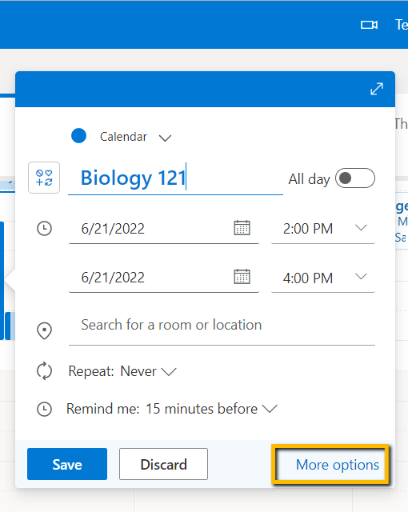
3. After you’ve saved the meeting, the Teams link will appear. Go back to the meeting and click Edit. You can then copy the link and paste it into your Brightspace course. When it’s time for class, you can click Join Meeting to start the Teams meeting
Zoom Usage Reports

Need to know which students attended your zoom sessions and for how long?


1. Log into your CCC Zoom account at http://cccedu.zoom.us 

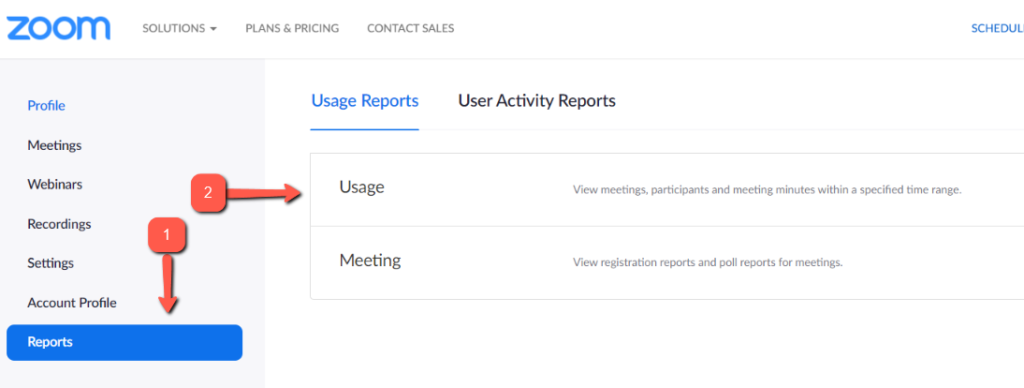
2. Click Reports then Usage

zoom interface with Reports selected and arrows pointing to "Reports" and "Usage"


3. Select a date range and click Search

4.  Click on the number (#) in the Participant column to view the list of attendees

Zoom usage report interface with date range and participant column highlighted

Why?

Use Chat within Brightspace to connect with students in real-time. Chat is an older tool that has not been updated in recent years, but still has its uses as a quick and easy way to have online conversations with your students and a clear record of the chat. The Chat tool is best for synchronous conversation at a scheduled time.

Setting Up

COURSE ADMIN->CHAT

Checking Logs

COURSE ADMIN->CHAT-> select the chat‘s down arrow(context menu)


Sessions screenshot

Related Articles

  • bulleted list
  • ideally 3 relevant KB articles
logo

Table of Contents

Voicethread with Brightspace and Zoom

Do you know about Voicethread

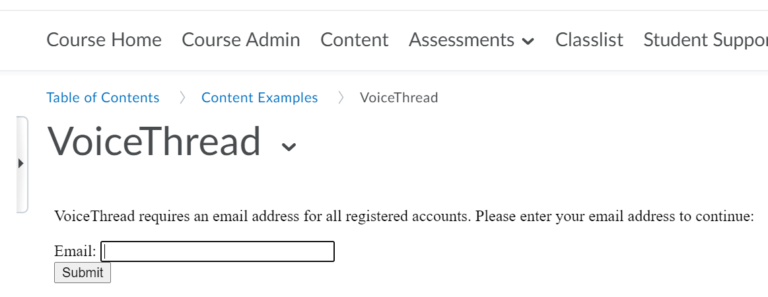
VoiceThread is an interactive, collaborative, web-based tool that that allows user to communicate through images, audio recordings, videos, and text. People can use VoiceThread to set up a discussion board, record a lecture, or show images. Users can add text, audio, or video comments to a VoiceThread, so students can ask questions at a specific point in a lecture or respond to discussion prompts. In addition, instructors can have students create their own VoiceThread presentations as part of an assignment.

Voicethread is integrated into Brightspace (Existing Activities > External Learning Tools) and you can even pull in a Zoom meeting recording directly from the platform? Learn more here and here.

Adding Voicethread to your Brightspace course

  • Navigate to your Content area of your course.
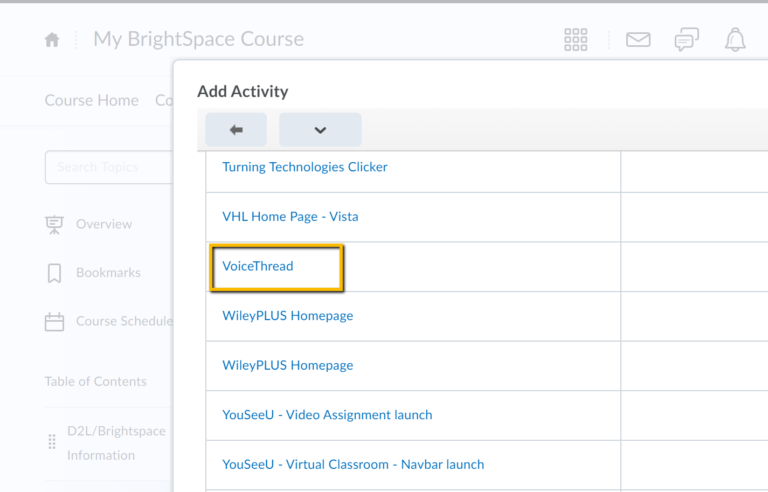
  • Go Add Existing Activities->External Learning Tools->scroll down to VoiceThread and select

Setting up

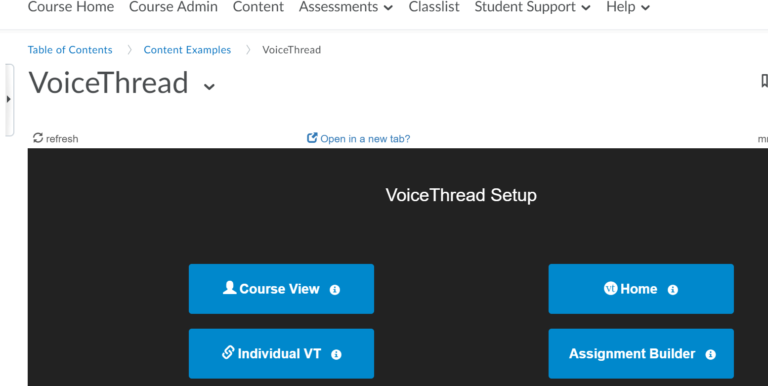
After you have created the VoiceThread link in your course Content, you will decide what you want students to see when they click on that link.

Screenshot
  • Course View

    • Display the collection of VoiceThreads that have been shared with your course. Anything that has not yet been explicitly shared with your course will not appear here.

      This is a good option when you want students to find and comment on each other’s work or if you want to allow students to review all course materials prior to an exam.

  • Home

    • Display all of a student’s VoiceThread content in a single view. This includes all VoiceThreads and all courses that belong to them.

      This option is useful if you want to create a simple portal into VoiceThread without directing students to any specific content.

  • Individual VT

    • Display any VoiceThread that you have created. When students click on the link, they’ll see just this one VoiceThread.

      This option is the best way to create a VoiceThread discussion board or lecture. Students will not need to look through a collection of VoiceThreads to find the correct one; they will be taken straight to it.

  • Assignment Builder

    • Create a graded assignment for students to complete. You can require them to create a VoiceThread of their own to submit, to comment on a VoiceThread you’ve created, or simply to watch a VoiceThread start to finish.

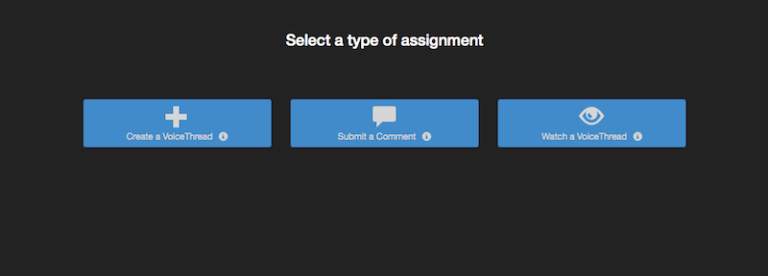
Building an Assignment

    • Create a graded assignment for students to complete.
      • Create their own 

      • Comment 

      • Watch 

    • Select the type of assignment and follow the prompts to complete the setup.

Student Assignment Submission

Grading VoiceThread Assignments

    • Go to your VoiceThread link in Content. Click on a student’s name on the right to see that student’s submission. Evaluate within VoiceThreads.
    • VoiceThreads are graded 0-100 or on a percentage. This percentage appears automatically in Grade.

‘Edit your Language Settings through settings cog.


You can toggle between the English and Spanish keyboard (shift + alt keys). Then you can press the apostrophe key and then any vowel to get the accent mark over it á. é, í, ó, ú, press the .key for the Spanish ñ


‘


If you do not want to add the Spanish keyboard then use the shortcuts below. Type the number using the number pad on your keyboard.

Table of Contents

Instructors

Video Note easily embeds video from your webcam or phone wherever there is the HTML editor. 

Engage learners through short videos 

in

  • Announcements
  • Content
  • Discussions

Provide meaningful video feedback 

in

  • Quizzes
  • Assignments
  • Discussions

How do I add Video Note through the HTML Editor 


  1. Go to the HTML Editor
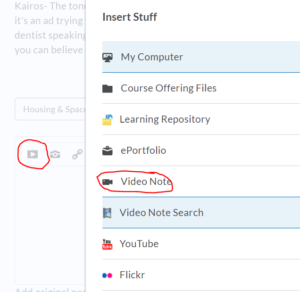
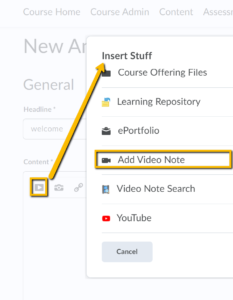
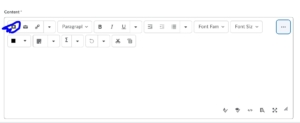
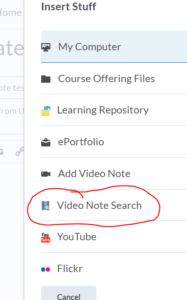
  2. Click Insert Stuff when the text editor window opens (see Figure 1, red circle)                                                

                                        Figure 1. Insert Stuff button with dropdown selections  

  1. Select Video Note (see Figure 1 in the dropdown selections).
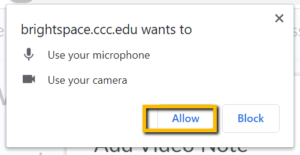
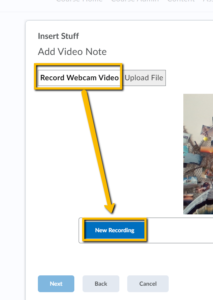
  2. Click Record Webcam Video and then New Recording.  
  3. Click Stop Recording when you are finished. 
  4. Click Next.
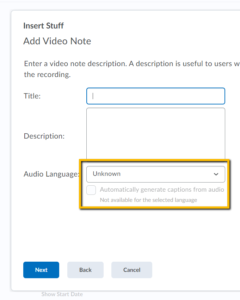
  5. Type in a Title and Description
  6. Click Insert to insert the video in the topic.
  7. Click Save 

 You can use Video Note anywhere there is an html editor—announcements, feedback, etc.  

insert stuff

Students

are able to attach Video Notes through the HTML Editor

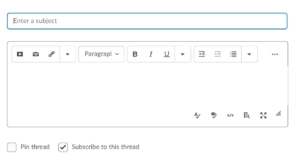
When adding a new thread to a discussion, Insert Stuff through the HTML Editor.

screen shot

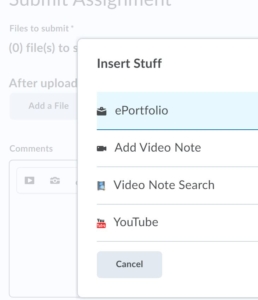
In Assignment, Insert Stuff through the HTML Editor.

As an instructor, you are able to add Video Note within your course content areas through the HTML Editor.

Create and insert a video note in HTML Editor 

  • In the HTML Editor, click Insert Stuff (the arrow icon in the first position) 
  • Click Video Note. 


Screenshot

Choose either to Record Webcam Video or Upload File.

If you select Record Webcam Video, follow the prompts.

  1.  
Screenshot
Screenshot
Screenshot

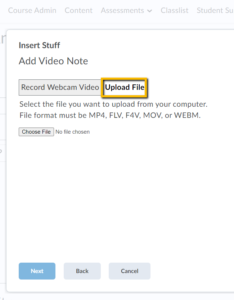
If you select Upload File, do the following: 

    1. Click Choose File and select the locally saved file you want to upload.
      • Note: You can only upload MP4, FLV, F4V, or MOV files that are less than 5.00 MB in size.
    2. Click Next, and enter a title and description. 
    3. Click Next, and then Insert. 
Screenshot

Use Video Note Search via Insert Stuff

If you want the same video in a different place, do this:

1. Go to the Content topic/module or discussion topic–anywhere there is the html text editor, in fact.

2. Click Insert Stuff and look for Search Video Note

3. Put in the title of the video and click Search

4. Click on the video once you have found it.

5. Voila!

Insert Stuff's Video Note Search