How do I set up Intelligent Agents (automated emails to students)?
communication
Intelligent Agents
An Intelligent Agent can be used to automatically send email to students when certain things happen or don’t happen. For example, an email communication can be triggered when students:
– haven’t submitted an assignment
– haven’t accessed your Brightspace course in xx amount of days
What tasks might I automate with Intelligent agents?
– Notify students they are doing well in the course
– Notify students when their grade falls below a certain level
Why use Intelligent Agents?
Intelligent Agents automate routine emails, which saves you time while maintaining a high level of student engagement. Timely, focused emails can be very effective at keeping students on their toes, leading to fewer withdrawals and late assignments.
Create an Intelligent Agent
Let’s create an Intelligent Agent to address a common situation: a student hasn’t logged into your course for 5 days.
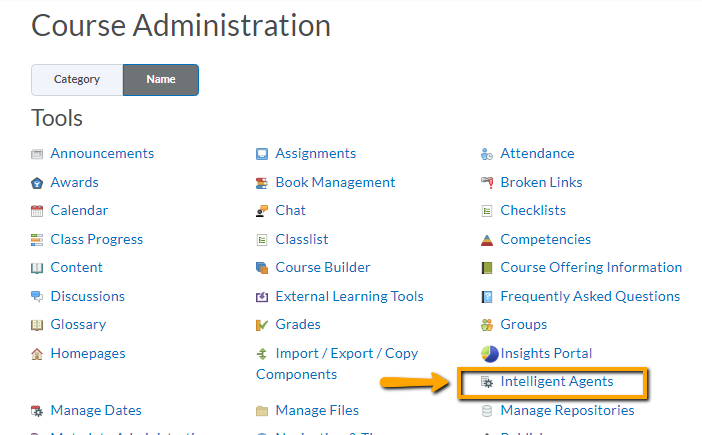
1. Go to Course Admin > Intelligent Agents
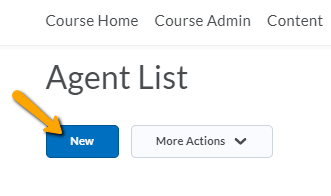
2. Click New under Agent List
NEW AGENT
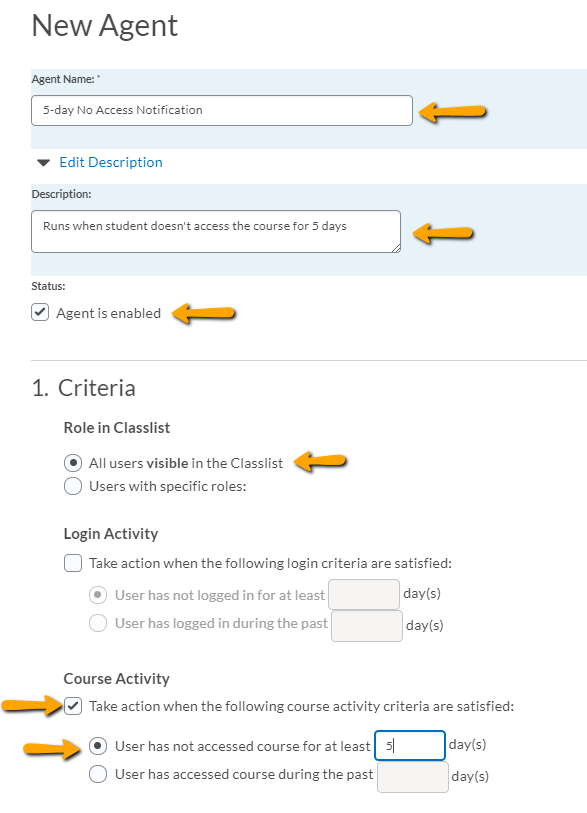
3. Give the intelligent agent a name such as 5-Day No Access Notification
4. In Description, state what will trigger the automatic e-mail. For example, “Runs when students do not login to the course in 5 days.”
5. Click Agent is Enabled to activate the agent or leave blank if you don’t want it enabled yet.
CRITERIA
6. Under Role in Classlist, select All users visible in the Classlist to indicate you want the agent to check all students from the classlist.
7. Under Course Activity, select Take action when the following course activity criteria are satisfied:
Select User has not accessed course for at least _____ day(s) and enter 5
8. Under Repetition, select Take action every time the agent is evaluated and the agent’s criteria are satisfied for a user
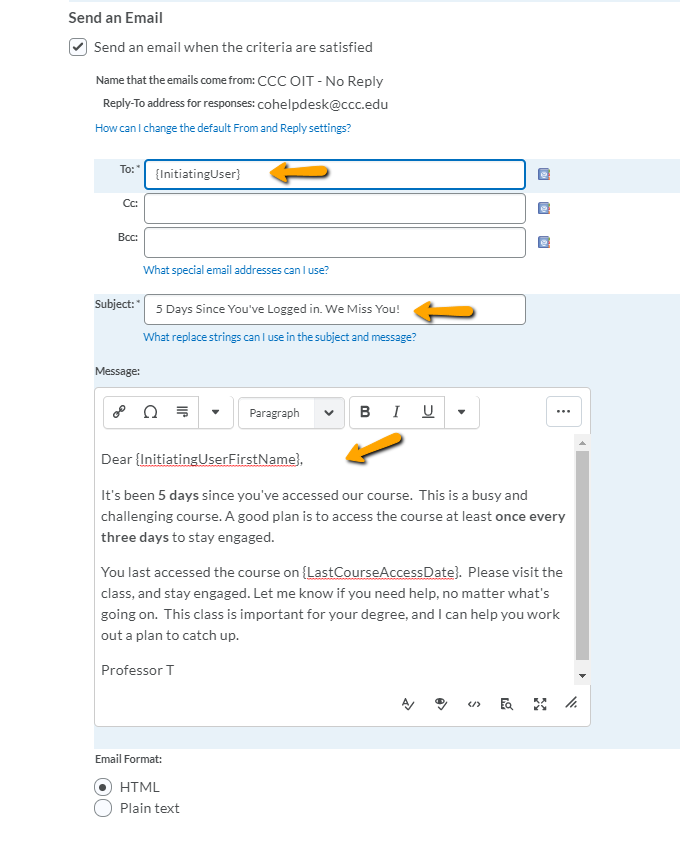
9. Under Send an Email, check the box Send an email when the criteria are satisfied.
To: {InitiatingUser}
Subject: include {OrgUnitName} plus something meaningful such as: 5 Days Since You’ve Logged in. We Miss You!
Message: include {InitiatingUserFirstName} and {LastCourseAccessDate} for personalization
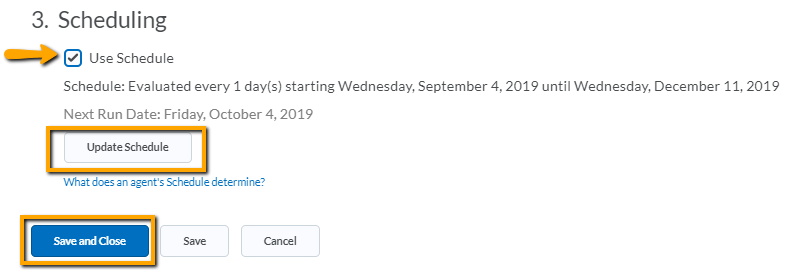
SCHEDULING
10. Select Use Schedule and click Update Schedule
11. Under Update Agent Schedule, select Daily, repeats every 1 day, and set a Start Date and End Date.
12. Click Update
13. Then click Save and Close
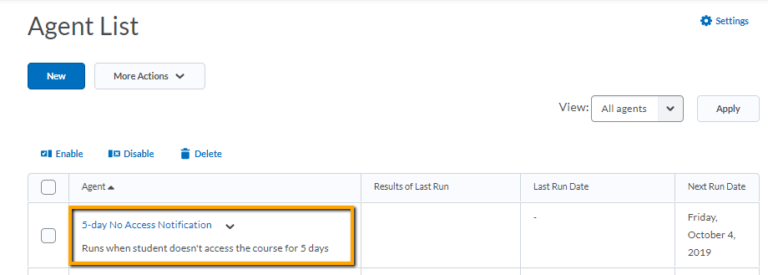
Your newly created Intelligent Agent will appear in the Agent List
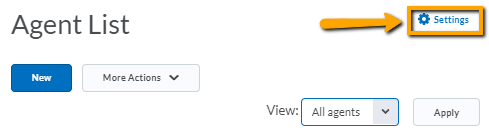
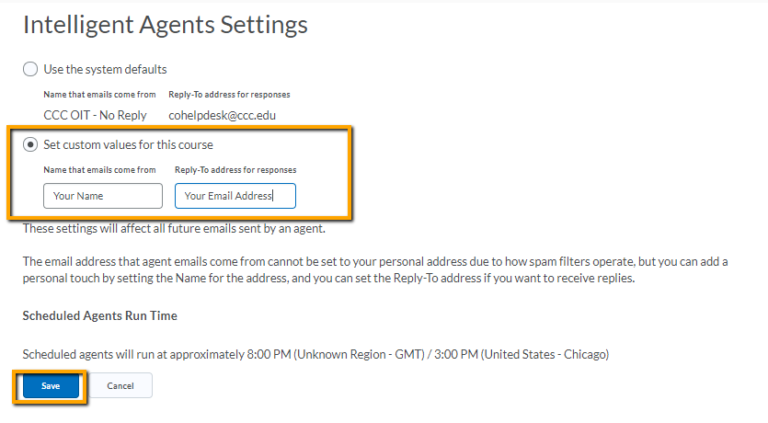
WarningMake sure you change the "From Email Address" to your own email address.
1. Click on Settings > Set custom values for this course
NoteYou are able to download an export of the agent results to a spreadsheet. This will allow you to use the data results your own way.
What does "Run" Mean with Intelligent Agents?The verb used with intelligent agents in Brightspace is "run." "Run" means the system is scanned to find when a certain condition exists. For example, if the intelligent agent is set to identify students who haven't logged in within 5 days, the intelligent agent will "run," generating a list of those students and then send an e-mail to them automatically. It's the same use as in "run a report" or "run a data search."
For more information on the advantages of Intelligent Agents and templates for the most commonly used Intelligent Agents, visit this Brightspace documentation on Intelligent Agents.