To customize the quiz results display
- From the New Quiz page or the editing page of an existing quiz, click the Evaluation & Feedback accordion.
- Click Customize Quiz Results Displays.
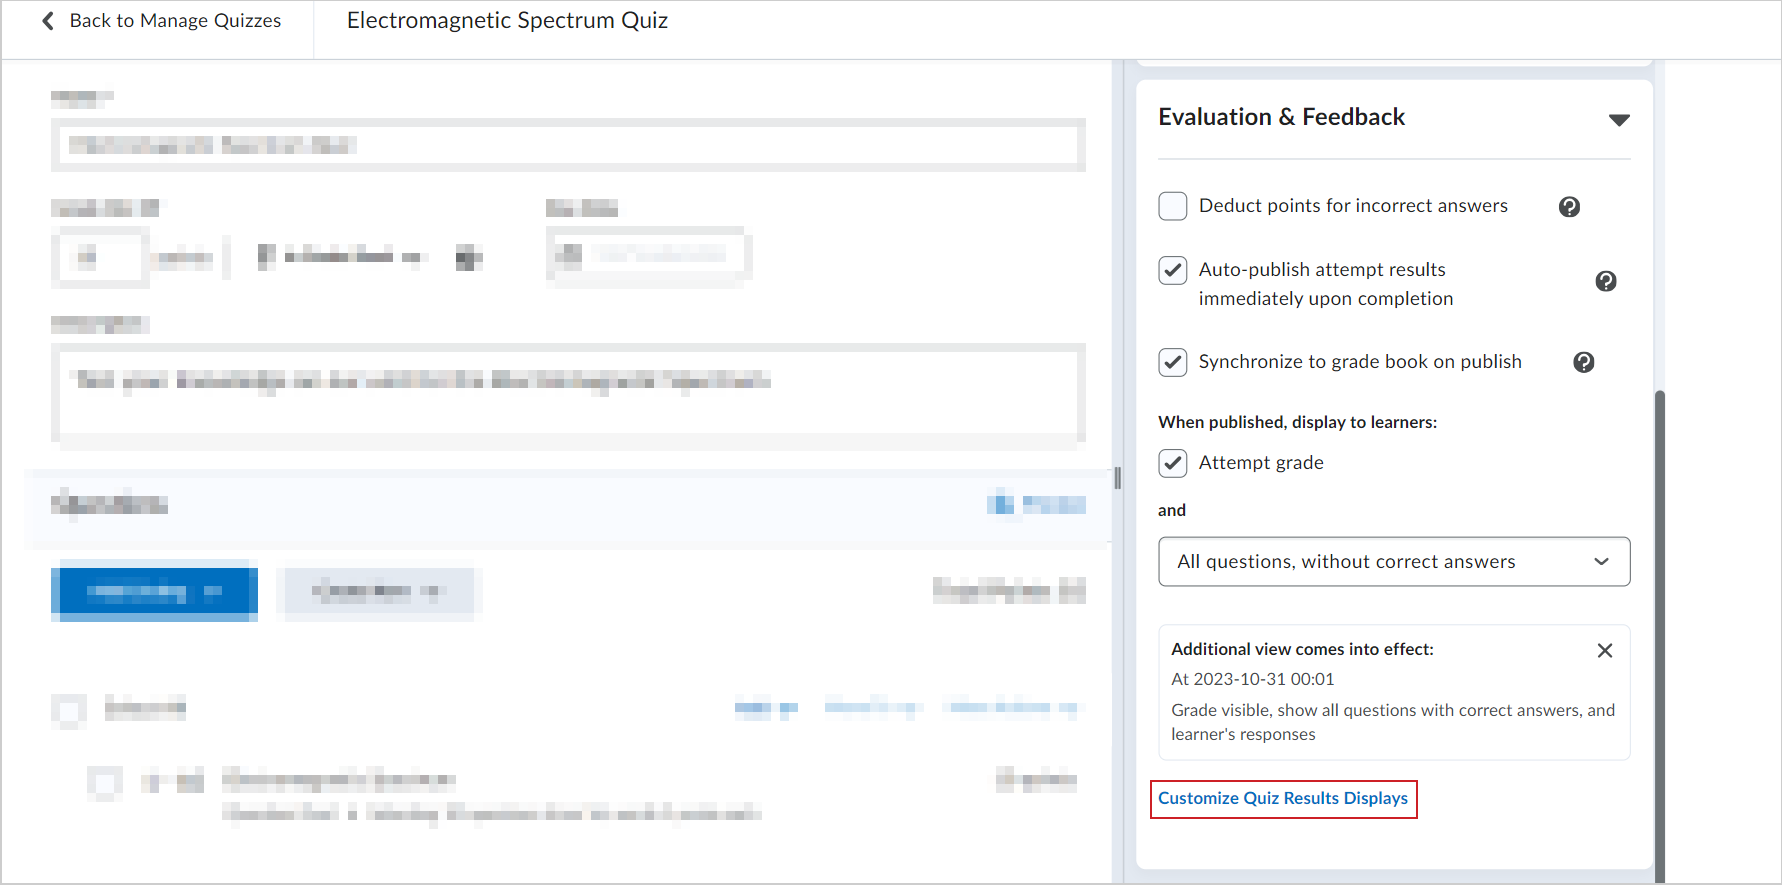
Figure: Click the Evaluation & Feedback accordion and then click the Customize Quiz Results Displays button.
- In the Customize Quiz Results Displays dialog, in the Primary View display section, click Edit View.
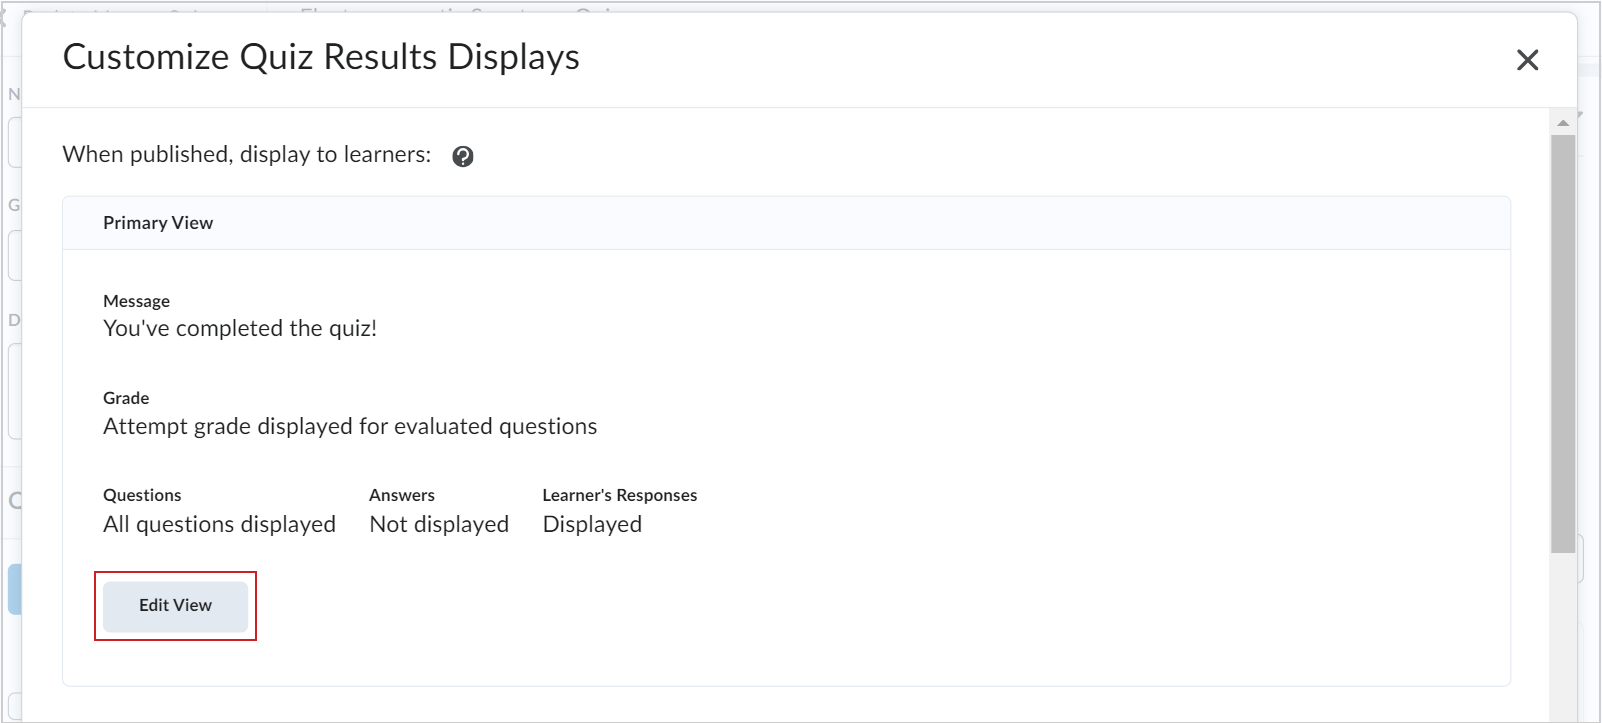
Figure: In the Primary View section, click Edit View.
- Customize the quiz results display with the following details:
- Enter a message in the Custom Message field.
- In the Grade section, select or unselect the Display attempt grade for evaluated questions checkbox.
- In the Questions drop-down menu, select an option for how you want quiz questions displayed after a learner submits their quiz.
- In the Statistics section, select the desired checkboxes if you want to Display class average or Display grade distribution stats to learners.
- Click Update.
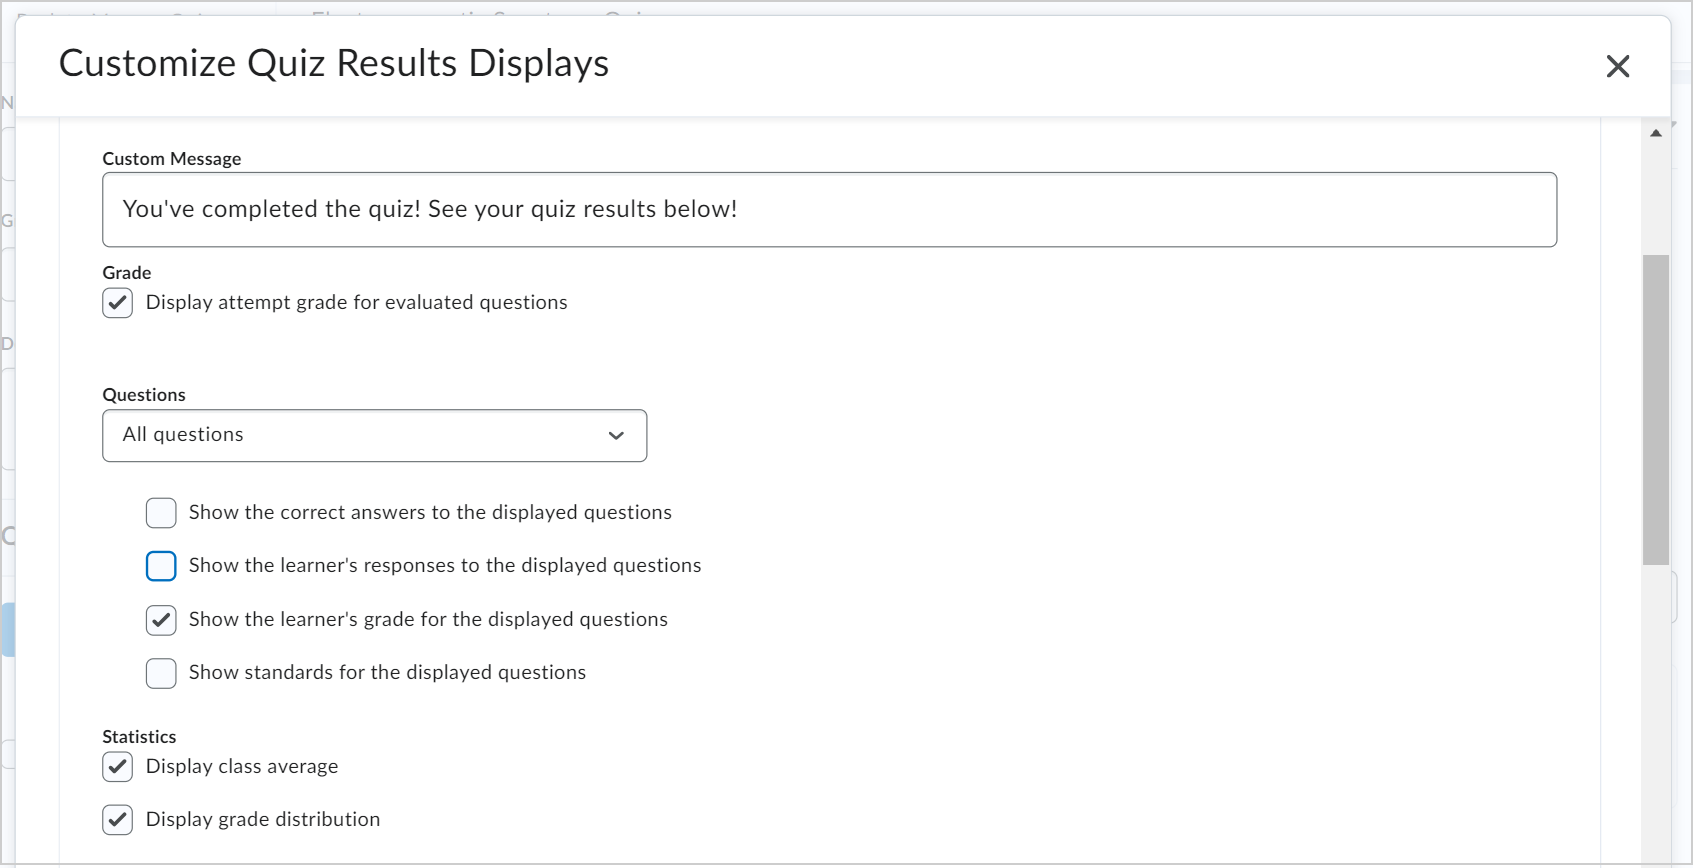
Figure: Enter the details for your quiz results display.
- If you want to add an additional view to the quiz, click the +Additional View button. The customization options are the same except you can also set a date and time when you want the additional view to appear.
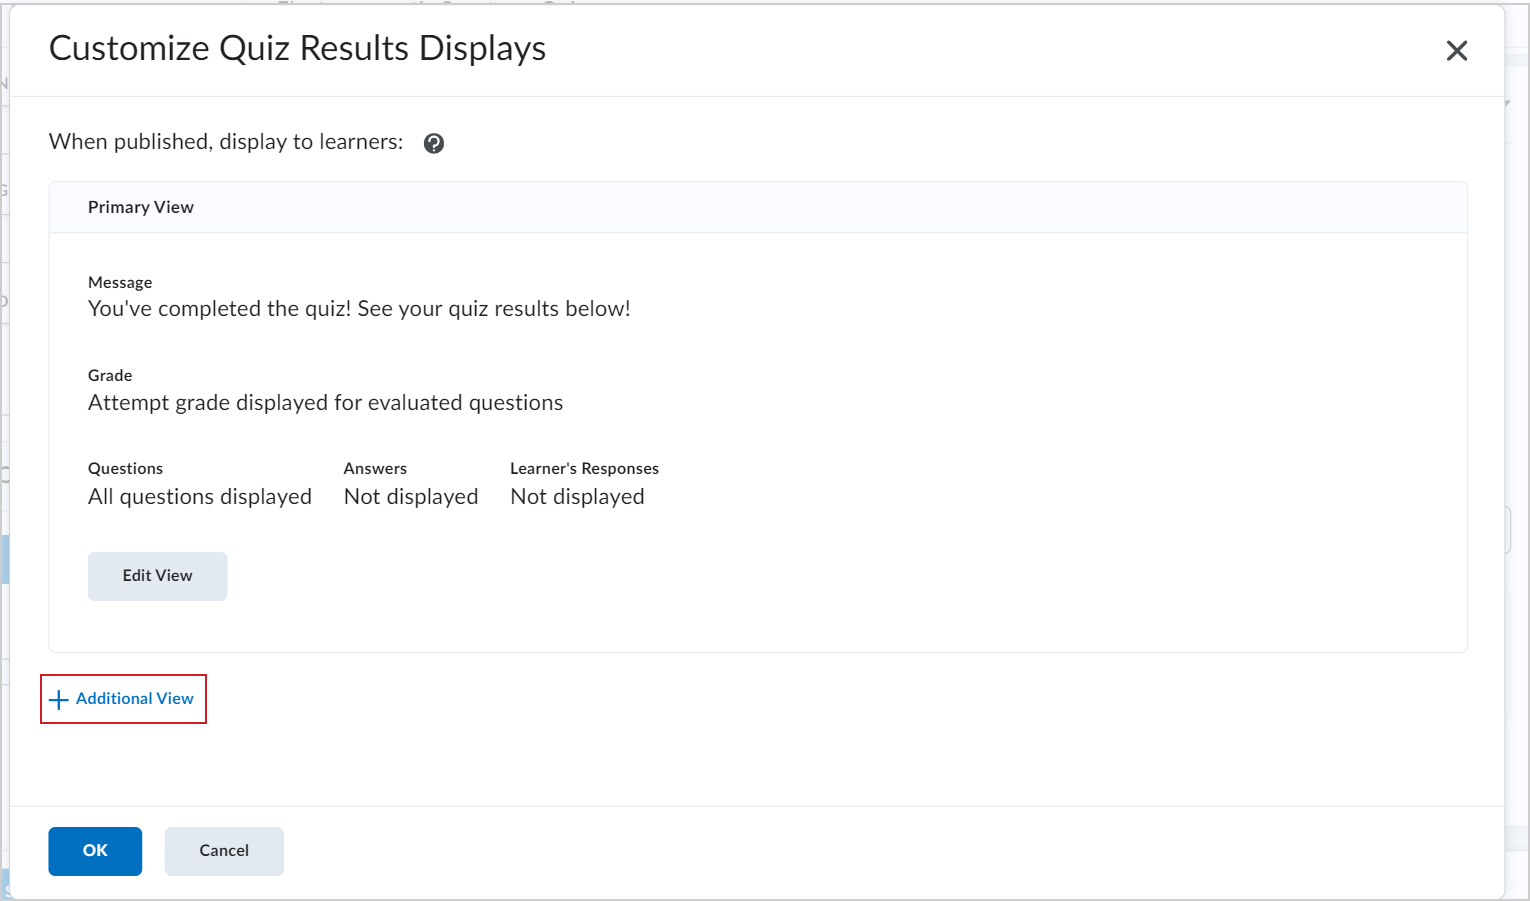
Figure: Click the +Additional View option to add another quiz results display.
- Click Create.
- Click OK.
- Click Save and Close.
Your custom quiz results display appears when learners submit their quiz. If you also created an additional quiz results display, it will appear for learners on the date and time set by you.