Brightspace’s Grades helps organize your grades, allows your students to securely keep track of their progress, and calculates students’ grades for you.
You can either use the Setup Wizard or the Settings tool to determine your grade book settings. Here, we will be going through the setup wizard.
Use the seven-step Setup Wizard to assist guiding you through the many grade options. This guide explains each step briefly.
For personalized help with setting up your gradebook, contact the Technology Integration Specialist at your college.
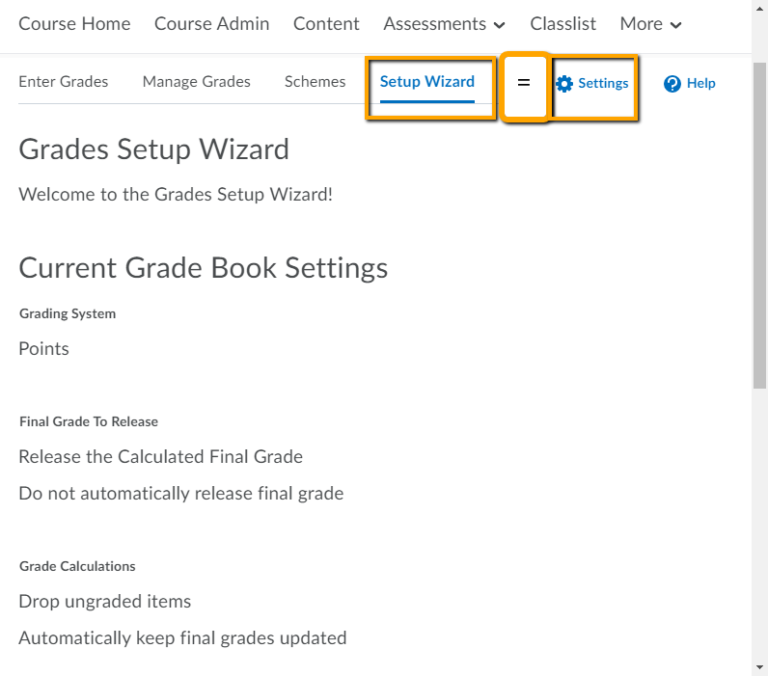
To access Grades’ Setup Wizard, go to CourseAdmin->Grades. Select the Setup Wizard tab.
2. You will see default settings displayed. Scroll to the bottom of the page and click Start.
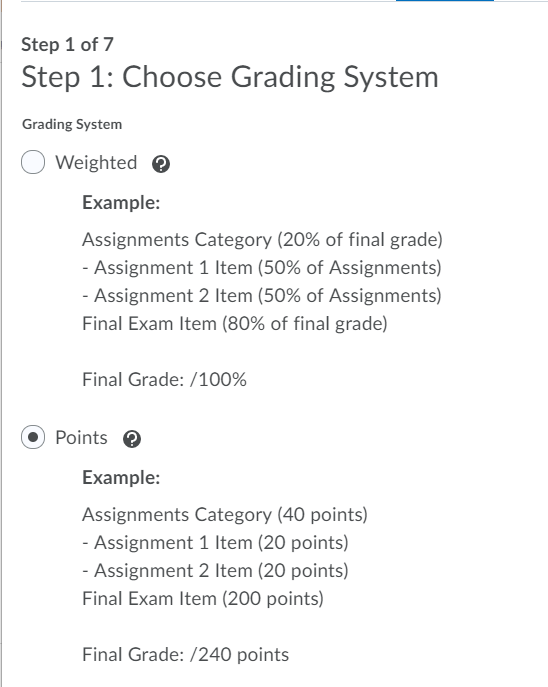
Step One: Choose Grading System
Most instructors use a Weighted or Points system. Look closely at the examples to see which type of grading system matches your syllabus and course learning objectives. Make your selection and click Continue.
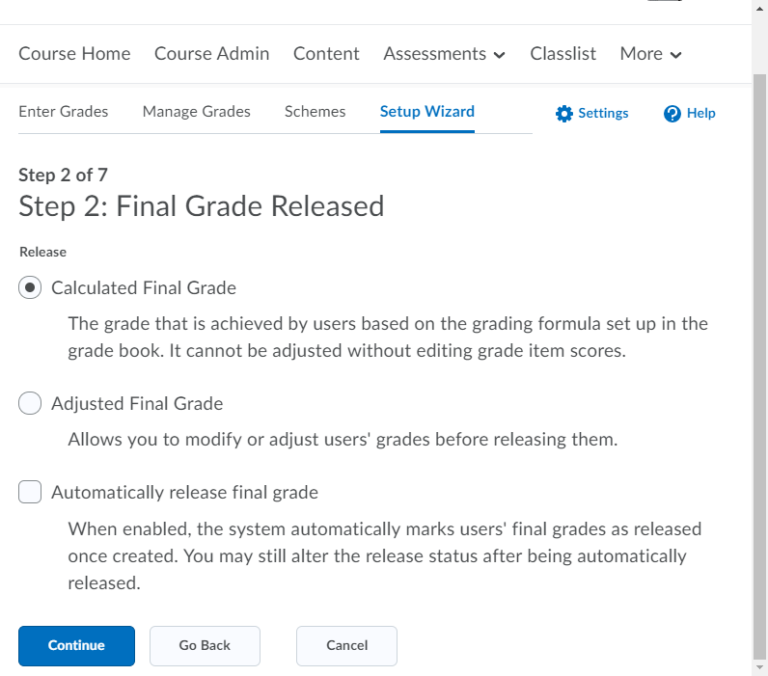
Step Two: Final Grade Released
a. To automatically calculate the final grade based on what’s in the Gradebook, choose Calculated Final Grade.
b. To manually override the calculated final grade choose an Adjusted Final Grade.
c. It is recommended not to check Automatically Release Final Grade.
d. Make your selection and click Continue.
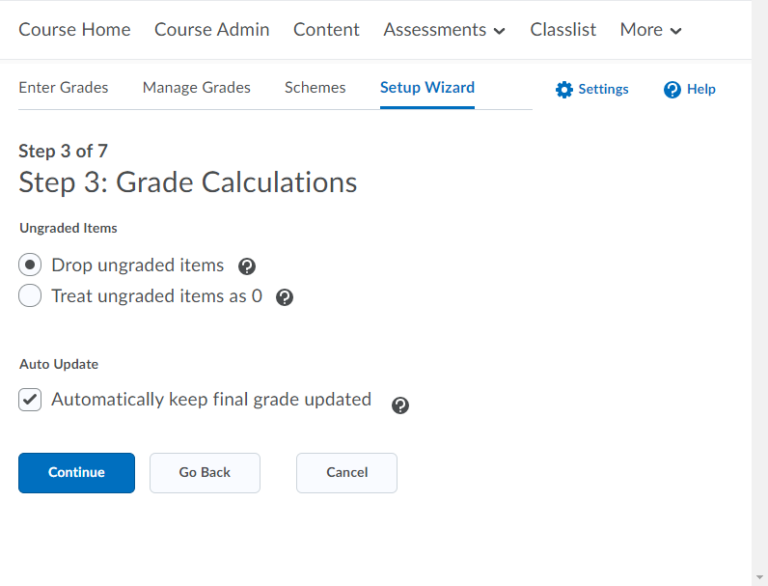
Step Three: Grade Calculations
a. Decide if ungraded items are to be dropped from the final grade calculation, or if they are treated as a zero when calculating students’ grades.
b. You can also determine whether you’d like the final grade to automatically update every time a new grade is added to the Grades.
c. Make your selection and click Continue.
Step Four: Choose Default Grade Scheme
Choose between Percentage and Letter for your default grade scheme. Make your selection and click Continue.
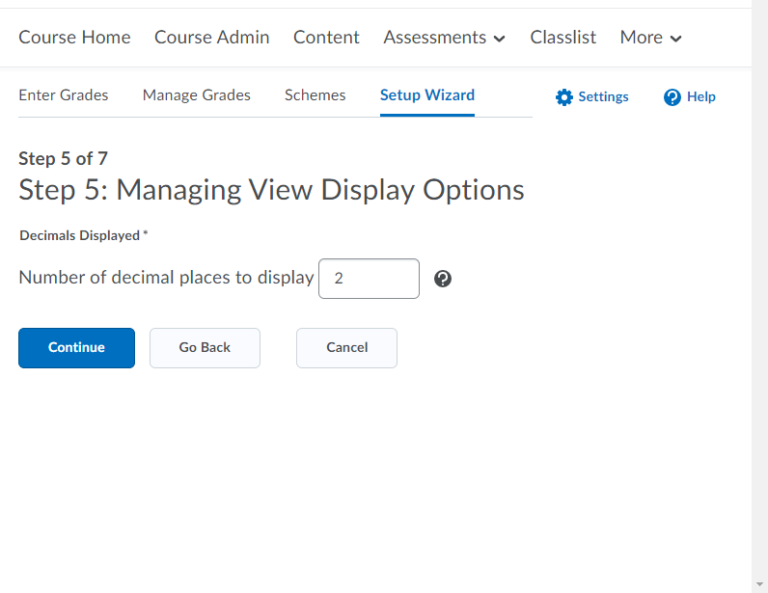
Step Five: Managing View Display Options
a. Choose the number of decimal places you’d like to view.
b. This is for your gradebook view, and not what the students would see.
c. Typically this would be left at 2 decimal places (example: .01).
d. Make your selection and click Continue.
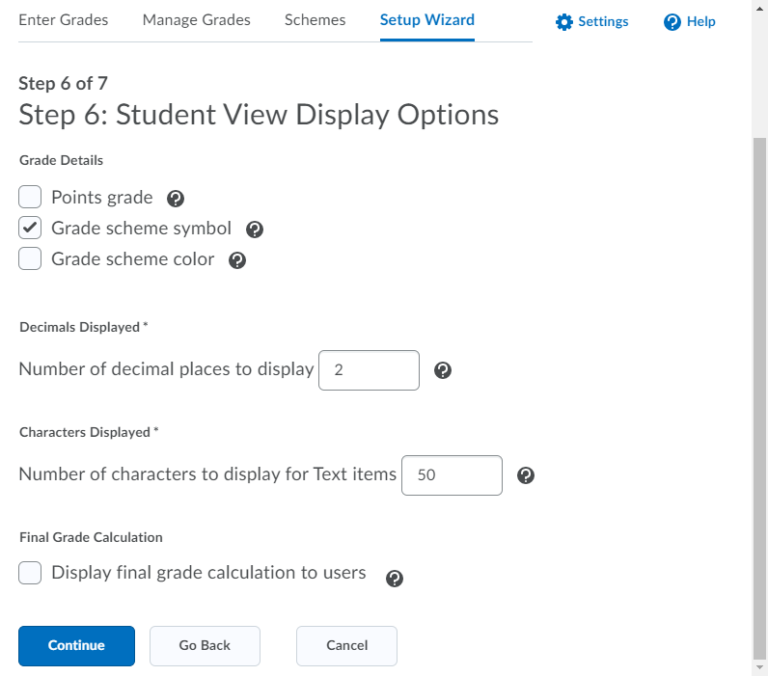
Step Six: Student View Display Options
Decide what you want your students to see when viewing their grades.
a. Points Grade – Students will see the point value of their score. Ex. 83/100
b. Weighted Grade – Students will see their score as a percentage. Ex. 83%
c. Grade Scheme Symbol – Students will see a symbol (letter grade) Ex. B- (Note: You must have set up a grade scheme in order for this to work).
d. Grade Scheme Color – The student’s grade view will have a shaded background color that varies according to grade. Ex. an A has a green background, an F has a red background.
e. Decimals displayed – You may or may not want students to view the decimals used when calculating their grade.
f. Characters Displayed – It is a good idea to leave this at 50.
g. Final Grade Calculation – Check this box for students to view their final grade calculation throughout the semester.
h. Make your selection and click Continue.
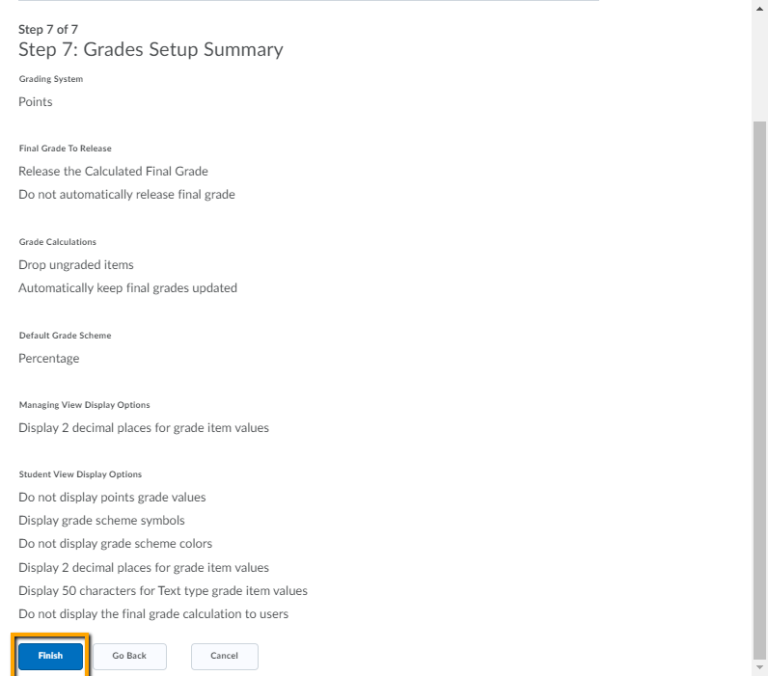
Step Seven: Grades Setup Summary
After reviewing your summary, click Finish. Return to the Grade Setup Wizard at any time to make changes.